
Shunlongwei Co. ltd.
IGBT Module / LCD Display Distributor
Customer Service
+86-755-8273 2562
IGBT Module / LCD Display Distributor
“In the process of project development, for the purpose of protecting the core algorithm, developers hope to encapsulate some core codes so that other users cannot view the specific code implementation details without affecting normal calls. The common idea is to encapsulate the core functions into a library, and the specific implementation method will be described below in conjunction with routines.
“
Author: Aki Li
In the process of project development, for the purpose of protecting the core algorithm, developers hope to encapsulate some core codes so that other users cannot view the specific code implementation details without affecting normal calls. The common idea is to encapsulate the core functions into a library, and the specific implementation method will be described below in conjunction with routines.
1. Library establishment
1). New library project
In CCS, select Project -> New CCS Project, in the project configuration window, select the corresponding “Target” device, and enter a custom project name; then you need to pay attention to “Project type and tool-chain -> output type” Select “Static Library” instead of “Executable”. “Executable” corresponds to the project that we generally use to generate .out executable files.

Figure 1 Creating a new library project in CCS
2). Define the relevant library functions
After creating a new project, you can put the functions to be encapsulated into the project file. Here, a simple function function is used as an example to illustrate.
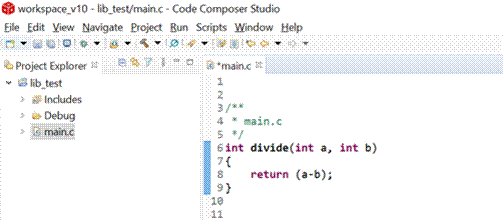
Figure 2. Add the object library function in the .C file
3).Add header file.h
First create a new “include” folder in the project directory, and then create a new folder in this folder
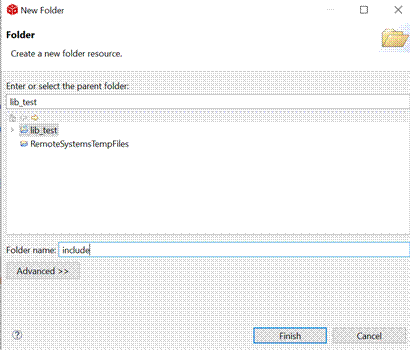

Figure 3 New .h file
Make function declarations for library functions in .h files.
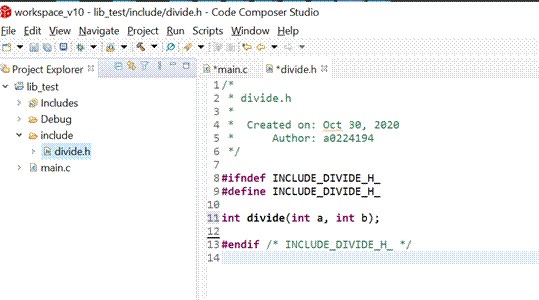
Figure 4 Function name declaration
At this point, compile the project to generate the required .lib file in the default Debug file path.
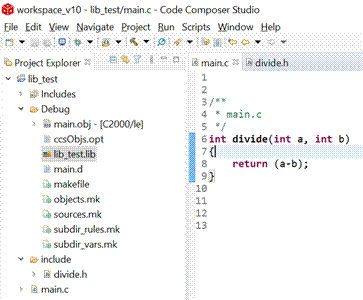
Figure 5 Compile and generate the corresponding .lib file
2. Use the library file in the project
Take the “led_ex1_blink” routine in C2000WARE as an example to illustrate how to use the defined library file in the actual project.
1) Create a file link
First, copy the .lib file generated in the first step and the folder where the .h file is located to the target project. Since the specific library function code implementation is embodied in the .c file, the final project cannot be indexed to the original .c file.
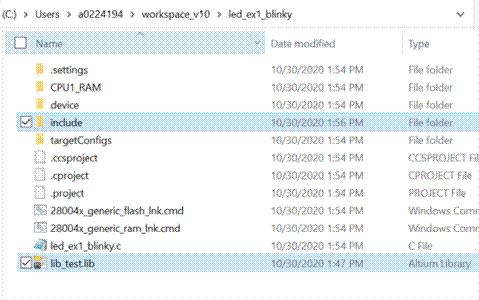
Figure 6 Copy the corresponding .h and .lib files
The next step is to establish a link relationship to the library file in the project. First, add the file path where the .h file is located in the project properties C2000 Compiler->Include Option. Note that the relative path is used here to ensure consistency when the project path changes.
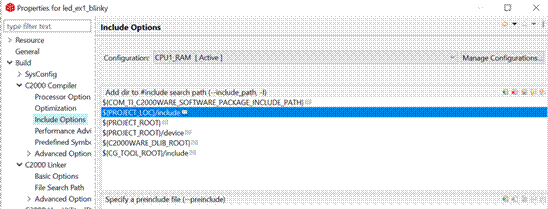
Figure 7 Add the file path where .h is located
Then, add the corresponding .lib file name and file path in C2000 Linker->File Search Path respectively.

Figure 8 Add .lib file name and path
2) Add function header file and call
Add the declaration of the .h file in the target project, as well as the test variable, and call it in the main function.
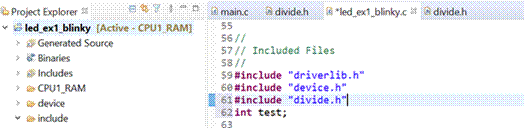

Figure 9 .h file declaration and calling example
Burn the project to the chip, and verify that the “test” result is as expected after running.
In addition, in addition to the above methods, you can disable the debugging function of the project in the following ways, so that you cannot perform any debugging operations and view the code in the debug mode. The specific steps:
Select “option –symdebug:none”, that is, select –symdebug:none as the Debugging model in the project properties Build->C2000 Complier->Advanced Options->Advanced Debug Options.
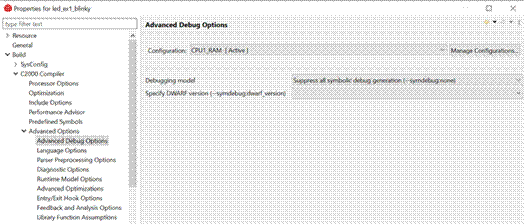
Figure 10 Enable option –symdebug:none
After selecting a routine and performing the above configuration, the effect in debug mode is shown in Figure 11. In this mode, all symbols and project links will be removed, so you cannot perform any debugging operations and view source code. It is recommended to use this mode in the final stages of project development.

Figure 11 Project example
The Links: RM500HA-2H MG100G1AL3


