
Content last revised on November 13, 2026
Backlight Startup & Illumination Debugging
With the display disconnected from power, inspect the connector latch, cable contact alignment, and mounting frame before attaching a test controller to the TX16D20VM5BAA. Photograph the identification label and connector orientation, then check whether the cable enters squarely without pulling against the panel frame. These observations provide a useful baseline when an intermittent image changes after cable handling or installation.
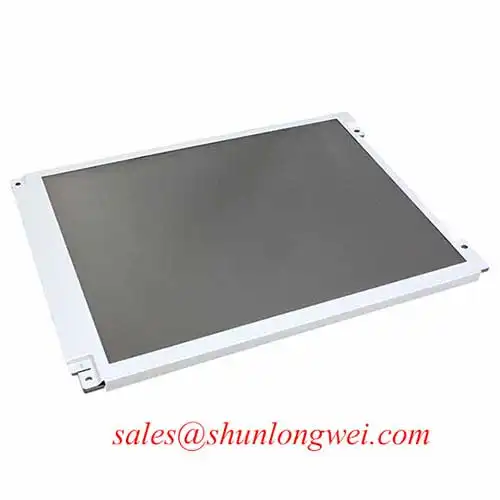
Verify the identification of the KOE / Hitachi TX16D20VM5BAA TFT-LCD active matrix color display module against its label and model-specific documentation. Consult the model-specific datasheet for diagonal size, dimensions, pixel count, interface, connector assignment, supply requirements, backlight configuration, and operating limits before energizing the panel. The diagnostic sections below describe inspection topics, not confirmation of a particular backlight or bus architecture.
Separate illumination behavior from image generation by displaying a stable test pattern through a compatible controller and observing whether the image and backlight appear together. As a Design Consideration, record startup behavior from the same initial thermal condition and at the same brightness command. A delayed light output, uneven illumination, or repeated startup attempt warrants investigation of the installed backlight subsystem rather than an immediate panel rejection.
For an equipment configuration documented as using a CCFL inverter, ignition measurements require appropriately rated high-voltage probes and the inverter manufacturer's procedure. Measure at the designated test locations without disturbing the operating load. Audible buzz should be correlated with the brightness command, mechanical mounting, and electrical waveform; sound alone does not establish a lamp fault. Do not apply a generic striking-voltage target to this model.
Assess optical uniformity with full-screen white and neutral gray patterns after the operating condition stabilizes. Keep ambient illumination, viewing direction, measurement distance, and controller settings consistent. Compare center and edge luminance and chromaticity rather than judging brightness from a photograph with automatic exposure. A bright patch, dark edge, or color shift should be recorded by location and checked for sensitivity to enclosure pressure.
As an Engineering Recommendation, evaluate readability in the intended installation lighting, including reflections from protective windows. Surface treatment, enclosure geometry, and ambient illumination influence perceived contrast. Neither sunlight readability nor a backlight service-life guarantee follows from a luminance specification alone, and light-output depreciation should not be treated as equivalent to MTBF.
Display Interface Synchronization & Logic Power Rail Verification
Match the controller schematic to the panel connector assignment before checking synchronization or applying logic power. A parallel RGB interface and a differential serial interface require different electrical checks; terminology associated with one must not be transferred to the other. As a Design Consideration, use the documented interface architecture to select probe locations, loading limits, and the appropriate timing reference.
Capture the panel supply, display-enable command, image signals, and backlight-enable behavior during startup and shutdown. Compare their order and timing with the approved panel and controller requirements. A white screen can accompany several conditions, including absent image data or incorrect sequencing, so verify the signal path before assigning a cause. During shutdown, observe whether image drive and illumination cease in the specified sequence rather than attempting an improvised discharge modification.
Use alternating pixel patterns, color ramps, and fine text to examine data mapping and timing stability. Incorrect colors or displaced image regions can justify checking controller configuration, cable continuity, and synchronization at the receiving connector. Differential impedance and lane mapping belong to a documented differential link; they are not generic requirements for TTL wiring.
For replacement assessment in a factory automation machine-tool HMI operator terminal, compare the TX16D20VM5BAA against the original assembly's electrical and mechanical requirements. The TX20D19VM2BAB can be included in a separate comparison, but its model name does not establish interchangeability. Connector location, mounting geometry, optical opening, timing, and backlight compatibility all need independent checks.
As an Engineering Recommendation, assess static-image retention using the actual interface layout and a subsequent neutral test image under controlled conditions. Interface blanking or content movement may help where the equipment permits it, but neither replaces the panel's operating guidance. Temperature-dependent motion smearing should likewise be evaluated within documented operating limits, without assuming that an auxiliary heater is required.
Industrial EMI Noise Immunity, Chassis Shielding Continuity & Common-Mode Ferrite Chokes
Correlate pixel disturbance with equipment operating states before changing shielding or adding suppression components. Record whether noise bands appear during motor acceleration, switching events, or brightness adjustment, then compare the behavior with a known-good signal path. As a Design Consideration, this comparison helps distinguish conducted interference, cable coupling, and controller timing problems without treating every horizontal artifact as an EMI failure.
Inspect chassis bonds and cable-shield terminations against the equipment grounding design. Keep the display cable away from high-current switching conductors where the enclosure permits, and preserve the intended return path. Ferrite selection requires measurements of the interfering spectrum and checks of signal integrity after installation; adding a choke without evaluation can introduce another variable rather than resolve the disturbance.
Where the installed backlight controller uses PWM dimming, compare electrical modulation with measured light output across the commanded brightness range. Look for unstable illumination, visible flicker, and coincident acoustic noise. The equipment designer should determine acceptable modulation behavior through controller compatibility and application testing, not a universal frequency prescription.
The All-Weather Clarity Technical Reference offers broader context for environmental display evaluation; it is not a qualification standard for this panel. Enclosure temperature, condensation exposure, and window reflections remain application-level checks. Display-module integration also does not establish finished-equipment EMC compliance.
Mechanical Stress Prevention & Display Assembly Inspection
Support the panel on a flat fixture and check that mounting features seat without twisting the frame. As a Design Consideration, mounting loads should follow the approved mechanical drawing, with clearance for cable routing and enclosure tolerances. A line defect that changes with mounting pressure warrants investigation, but it does not by itself identify an internal driver-bond fracture.
💡 Bench Tip: With power removed and ESD precautions in place, insert the ribbon cable squarely before closing the connector latch.
Run full-screen red, green, and blue patterns, followed by black, white, and gray fields. Record persistent bright or dark points, missing lines, and spatial nonuniformity under consistent viewing conditions. Acceptance limits should come from the applicable inspection agreement rather than an invented universal pixel-defect allowance. Oblique illumination can help reveal a faint image when backlighting is absent, but it cannot independently identify the failed assembly.
Inspect the flexible cable for creasing, abrasion, and tension near its termination. Route it so normal assembly does not repeatedly flex the contact transition or pull on the latch. Do not infer a bend-cycle lifetime from appearance; use the cable specification and the equipment's movement profile.
For an optically bonded installation, evaluate window alignment, edge clearance, adhesive compatibility, and the enclosure sealing method separately. Optical bonding alone does not establish a hermetic barrier. Compare image uniformity before and after assembly, and investigate newly introduced pressure marks or edge shadows before accepting the completed display assembly.