Content last revised on October 21, 2026
6MBI100S-120-50 Identification and Incoming Inspection
- Verify the isolated module marking against 6MBI100S-120-50, then match the terminal orientation to the circuit drawing before connecting test leads.
- With the DC link discharged and the module disconnected, record diode-mode readings in both directions across corresponding power-terminal paths.
- Inspect the mounting face, heatsink contact area, terminal hardware, and gate connections for damage or contamination before mechanical assembly.
- Check the equipment’s insulation-test procedure and disconnect sensitive electronics before applying any external test voltage.
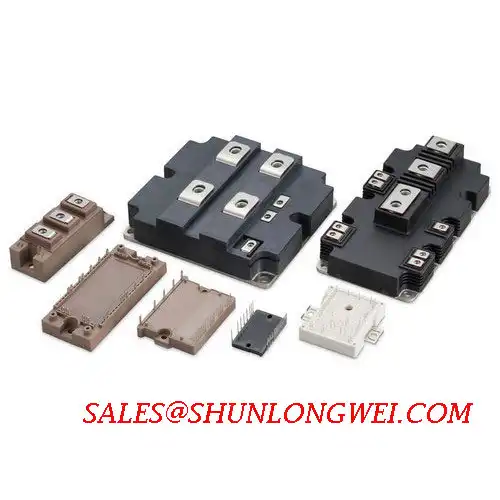
The Fuji Electric 6MBI100S-120-50 is an IGBT module rated at 1200 V and 100 A, supplied in a Fuji Power Module package. Incoming inspection should establish terminal identity and cold-state electrical consistency before the module reaches a powered test fixture. A successful multimeter check is a screening result, not proof of switching performance or insulation withstand.
| Product characteristic | Specification | Parameter identity |
|---|---|---|
| Manufacturer | Fuji Electric | Product identification |
| Model | 6MBI100S-120-50 | Product identification |
| Rated voltage | 1200 V | Official Specification |
| Rated current | 100 A | Official Specification |
| Package / case | Fuji Power Module | Official Specification |
| Terminal numbering, dimensions, mounting limits, and insulation-test conditions | Consult the exact model datasheet | Model-specific verification required |
During diode-mode screening, identify each intended diode path from the circuit diagram rather than inferring polarity from terminal position. Compare corresponding paths with the same instrument, lead orientation, and approximate module temperature. Unexpected conduction or a substantial difference between equivalent paths warrants further isolation and measurement; a single forward-voltage reading does not establish the cause.
💡 Bench Tip: Use ESD-controlled handling and compare cold-state readings against a known-good module of the same model before interpreting an unusual result.
6MBI100S-120-50 Circuit Protection & Reliability: Balancing Switching Dissipation vs di/dt
Identify the existing turn-on and turn-off gate-resistor paths before changing a legacy driver board. As a Design Consideration, separate resistance paths permit different control of current rise and turn-off behavior, but their effectiveness depends on the driver output stage, gate-loop routing, and module characteristics. Record the installed network first, including steering diodes and any shared resistance, so that later waveform changes have a traceable baseline.
Increasing gate resistance generally slows switching and can reduce certain transient stresses, while increasing switching dissipation. Reducing resistance can shorten transitions but intensify ringing or overshoot. Neither direction is automatically an improvement. When evaluating the 6MBI100S-120-50, engineers should assess collector-emitter voltage, collector current, and gate-emitter voltage together under controlled operating conditions. A clean-looking gate trace alone cannot establish acceptable power-terminal behavior.
Measure gate voltage close to the module’s designated gate and emitter connections, using an appropriately rated measurement arrangement with a compact sensing loop. Long probe connections can add ringing that belongs to the measurement setup rather than the device. Compare turn-on and turn-off events separately, and retain the same probing arrangement when evaluating resistor changes. Check driver supply stability and output-stage loading as part of the comparison.
For protection coordination, review how the driver detects abnormal conduction and how it removes gate charge during a fault. Switching-speed adjustments should remain compatible with the equipment’s detection and shutdown behavior. The Fuji Electric V-Series IGBT Application Manual provides manufacturer guidance on IGBT application principles; it is not a substitute for this model’s individual limits or its original drive-board documentation.
Keep the commutation loop compact where the mechanical arrangement permits, and separate sensitive gate routing from high-current switching paths. Insulation spacing must follow the equipment’s applicable requirements rather than a generic module-page dimension. For the relationship between busbar geometry, transient overshoot, and damping, Mastering Power System Dynamics provides additional engineering context. Any snubber adjustment should be checked for its own dissipation and its effect on measured switching stress.
6MBI100S-120-50 Operational Boundaries: Evaluating Baseplate Convexity Inspection Limits
Inspect the module mounting face and heatsink separately before deciding whether an apparent gap represents unacceptable deformation. As a Design Consideration, mounting-face curvature can affect contact pressure and thermal-interface distribution; an unloaded face should not automatically be judged against an assumed perfectly flat profile. Compare measured shape with the manufacturer’s permitted geometry and measurement method, without attempting to straighten the module.
Remove residual interface material using an appropriate non-damaging method, then inspect for burrs, raised contamination, and damaged mounting seats. Check heatsink flatness over the actual contact footprint rather than only along an accessible edge. Rocking on the heatsink can result from local contamination or surface damage, so locate the contact obstruction before drawing conclusions about the module itself.
Apply the specified thermal-interface material through a controlled assembly process. Uniform coverage and the manufacturer’s permitted bond line matter more than an assumed universal coating thickness. Where the mounting instructions permit staged diagonal tightening, a calibrated tool and progressive cross-pattern sequence help distribute clamping pressure. Use the specified mounting torque; terminal hardware and baseplate fasteners need not share the same limit.
Align busbars without using the module terminals to pull a displaced assembly into position. Mechanical preload from a rigid conductor can remain after the fastener reaches its intended torque. Support conductors appropriately, inspect locking arrangements against the equipment’s vibration requirements, and check that washers or insulation barriers have not shifted into electrical clearance paths. These are assembly checks, not additional factory ratings for the module.
Terminal verification should follow the exact circuit symbol and terminal drawing. Fuji Electric’s PIM Power Integrated Module information illustrates why module-family names alone cannot establish internal circuit equivalence: integrated power-module configurations require their own circuit checks. That reference does not identify the 6MBI100S-120-50 as a seven-pack PIM.
When evaluating a heavy-duty variable-frequency AC motor drive, compare the original module’s electrical limits, terminal arrangement, mounting geometry, cooling conditions, and driver compatibility. The related 6MBI25J-120 can be included in a component comparison, but it should not be treated as a direct replacement simply because its designation belongs to a related Fuji product family. Replacement acceptance requires a complete parameter and interface match.
Keep insulation verification distinct from power-terminal diode testing. The 1200 V device rating is not a terminal-to-baseplate dielectric-test instruction. A withstand assessment requires the specified test connections, waveform, duration, and acceptance criteria; an arbitrary higher test voltage does not demonstrate useful operating margin.
Transient Dynamics & Electrical Design: Long Motor Lead Reflected Wave Voltage on 6MBI100S-120-50
Measure switching waveforms at both the inverter output and motor terminals when investigating cable-related voltage stress. As a Design Consideration, a fast voltage transition travels along the cable and reflects where its characteristic impedance differs from the motor’s high-frequency input impedance. Under idealized near-open-circuit reflection conditions, the incident voltage step can approximately double at the receiving end; that relationship is not a guaranteed terminal peak for a particular installation.
Distinguish motor-terminal reflection from collector-emitter overshoot inside the inverter. The former depends strongly on cable propagation and load termination, while the latter also involves the local commutation path and switching current. Their waveforms can interact, but reducing one observed peak does not establish that the other is controlled. Compare synchronized measurements where practical, using probes suitable for the voltage, common-mode conditions, and transition speed.
For integration involving the 6MBI100S-120-50, evaluate cable length, cable construction, motor insulation requirements, switching transition behavior, and the equipment’s permitted output network. Avoid selecting an output choke solely from nominal current. Its inductance, frequency-dependent behavior, losses, and interaction with cable capacitance influence the resulting waveform. A dv/dt filter likewise requires coordination with the drive and motor rather than selection from the module’s voltage rating alone.
After any gate-network, cable, or output-filter change, compare the revised motor-terminal waveform with the original measurement and recheck module switching stress and thermal behavior. If ringing changes unexpectedly, inspect probe placement, filter wiring, and conductor routing before attributing the result to the module. Acceptance should rest on measured behavior within the equipment and motor limits, with the final resistor and filter configuration recorded for subsequent service work.