Content last revised on September 10, 2026
LQ121S1LG55 Inspection and Compatibility Check
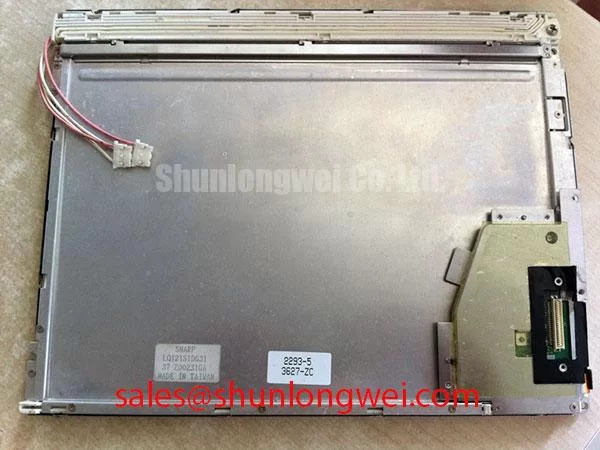
Before fitting the Sharp LQ121S1LG55, inspect the TFT LCD display module perimeter, connector area, and mounting points under controlled lighting, then compare the original equipment documentation against the replacement assembly before applying power.
The LQ121S1LG55 is identified as a Sharp industrial grade LCD and HMI panel supplied in a TFT LCD display module construction. Its factory specification status is listed as Official Factory Spec Verified. For service work, the panel part number alone is only one part of the compatibility check. The maintenance engineer should also confirm the original host interface, power sequencing requirements, mounting arrangement, bezel compression method, optical surface condition, and the condition of connected display electronics.
| Product model | LQ121S1LG55 |
| Manufacturer | Sharp |
| Product category | Industrial Grade LCD and HMI Panel |
| Module construction | TFT LCD Display Module |
| Specification status | Official Factory Spec Verified |
When assessing an industrial display replacement, engineers should obtain the original panel documentation rather than assuming supply rails, signal format, backlight technology, brightness, resolution, operating temperature range, touch compatibility, or optical treatment from the part number. Those characteristics are system critical and must match the existing equipment architecture.
Flush Mount Open Frame Bezel Integration and Perimeter Gasket Shock Isolation
For an open frame installation, begin by checking whether the chassis bezel holds the panel uniformly around its intended support area. A display can appear mechanically secure while carrying uneven localized force at one corner or along a narrow edge. This can create visible nonuniformity, pressure marks, or dark field mura after the equipment has warmed up. The practical aim is to support the module consistently without turning the decorative bezel into a clamping device.
The LQ121S1LG55 should be seated against clean, flat mating surfaces. Remove hardened adhesive residue, displaced foam, loose debris, and burrs from the chassis contact points before fitting the panel. If the original equipment uses a perimeter gasket, inspect whether the gasket remains continuous and whether its thickness is consistent around the opening. A distorted gasket can transfer vibration unevenly and can also allow dust paths into the front assembly.
An M3 cross pattern tightening approach is a Design Consideration for assemblies that use M3 panel fasteners. The stated 0.35 to 0.45 N·m range is a chassis level assembly reference, not an official Sharp parameter for this specific display module. The final tightening limit must be verified against the host equipment mechanical drawing, fastener type, threaded insert material, bracket design, and the panel documentation. Alternate fasteners should not be selected simply because they fit a mounting hole.
Observe the image during and after mechanical fitting. A uniform black or low level image can make pressure related optical changes easier to identify than a bright graphic. If a localized patch appears only after the bezel is tightened, release the assembly, inspect support points, and verify that cable routing is not pulling one side of the panel frame. This check is more informative than repeatedly replacing electronics when the root condition is mechanical.
⚠️ Maintenance Note: During scheduled service, check that ventilation paths remain clear and that perimeter gaskets have not hardened, shifted, or trapped moisture against the display assembly.
Backlight life statements require care. A brightness half life figure, including a value such as 50,000 hours to a specified retained brightness, cannot be assigned to the LQ121S1LG55 unless it is stated in the applicable factory documentation under defined operating conditions. Constant current control, enclosure temperature, dimming duty, airflow, and display usage pattern all affect service results. For a repair decision, measure the installed display’s luminance behavior where suitable equipment is available and compare it with a known healthy unit or the original equipment acceptance criteria.
Where a different panel is being evaluated because the existing mechanics cannot be restored, the LMS700KF01-001 can be reviewed as a separate display option. It should not be treated as a direct mechanical or electrical substitute without checking its drawing, interface, optical characteristics, mounting scheme, and host controller compatibility.
VESA versus JEIDA Data Mapping Alignment and Even Odd Channel Signal Integrity
Before connecting the LQ121S1LG55 to an industrial controller, trace the existing cable path from the display connector to the host board and document every inline adapter, shielding termination, converter board, and grounding point. A panel replacement can be mechanically correct yet show inverted colors, divided images, unstable pixels, or no image because the host side signal mapping is not aligned with the display requirement.
VESA and JEIDA describe different digital data mapping arrangements used in certain display signal systems. Mapping selection is not a cosmetic preference. The display documentation and original controller configuration must agree. If the original panel image is unavailable, preserve photographs and connector orientation records before disassembly. Engineers should compare the original panel designation, host board documentation, and signal pin definitions rather than moving wires based solely on visual connector similarity.
The system integrator should verify the required supply voltage from the original panel documentation. The power on rise behavior, enable relationship, and data arrival timing must also be confirmed from the actual panel and controller requirements. It is not appropriate to assign a 3.3 V or 5.0 V logic supply to this model without the applicable factory record. Applying an assumed rail can create an avoidable service failure.
For differential display links, controlled impedance routing is a Design Consideration rather than an official LQ121S1LG55 specification unless specified in the panel interface document. In systems designed for a nominal 100 Ω differential path, cable selection, connector quality, shield continuity, pair balance, and return current behavior should be checked as one chain. The system engineer should validate waveform quality at the panel end against a known good signal path, particularly where servo drives, switching power equipment, relays, or motor cables share the same cabinet.
Even and odd channel problems should be investigated methodically. Check connector seating, retained cable clamps, bent contacts, cable abrasion at cabinet hinges, and whether an interface cable has been folded sharply near its termination. If split screen artifacts, intermittent color changes, or image flicker appear, these observations may indicate a mapping, continuity, impedance, timing, or grounding issue. Use an oscilloscope and the original system documentation to isolate the condition instead of assigning one symptom to one cause.
Industrial electromagnetic compatibility is an enclosure and system responsibility. The display module itself should not be described as independently compliant with equipment level EMC standards. Practical integration measures include preserving original shield terminations, keeping signal wiring separated from high energy conductors where the cabinet layout permits, and confirming that bonding paths remain intact after service. These measures help the system engineering team assess susceptibility in the installed environment.
Touch behavior also belongs to the full HMI assembly rather than the TFT LCD module alone. A resistive or projected capacitive touch overlay, if used by the host equipment, needs its own controller, sealing strategy, and validation for gloved operation or water exposure. The LQ121S1LG55 should not be assumed to include a touch layer or a particular touch technology without the original assembly documentation.
Suppressing Localized Thermal Gradients to Prevent Chronic Optical Yellowing and Color Shift
Inspect the display compartment before replacing the panel. Look for blocked vents, failed circulation fans, discolored nearby plastics, heat stained connectors, loose shielding covers, and power components mounted close to the display edges. These observations help identify whether thermal loading in the enclosure could affect the complete HMI assembly. A replacement panel should not be asked to compensate for a cabinet cooling fault.
Localized heating can contribute to uneven visual aging across a display assembly. The exact internal optical materials and their thermal limits for the LQ121S1LG55 must be taken only from Sharp documentation. It is not appropriate to claim a particular light guide material, optical yellowing threshold, L70 rating, B50 rating, or backlight construction where those details are not supplied in the verified factory parameter set.
Using aluminum support or heat spreading rails can be a Design Consideration when the equipment designer is addressing edge hot spots in a tightly enclosed HMI. Their geometry, contact method, electrical isolation requirements, and thermal path must be determined at system level. The objective is to avoid creating a new mechanical stress path while reducing unwanted local temperature concentration. Engineers should validate the result with temperature measurements under the actual duty cycle and enclosure configuration.
Cold environments require equally careful assessment. Liquid crystal response can slow as ambient temperature falls, but no specific subzero operating limit or response time behavior should be attributed to the LQ121S1LG55 without its official environmental specification. Where an equipment enclosure includes a heater, thermostat, or anti condensation strategy, those functions should be tested as part of the whole assembly. Condensation control is particularly important after equipment is moved between cold and warm locations or when a sealed cabinet is opened during maintenance.
Visible color shift, reduced contrast, or sluggish image updates can arise from several conditions, including temperature, cable performance, controller settings, aging in associated electronics, optical contamination, or panel related behavior. Capture the display state, ambient condition, and operating duration when the symptom occurs. This evidence supports a more reliable repair decision than judging image quality from a single cold startup.
For broader enclosure, sealing, display interface, and service planning context, engineering teams can review Industrial Display & HMI Solutions. The guidance should be applied alongside the original equipment drawings and the verified documentation for the specific Sharp panel.
High brightness and glare reduction also require verification at assembly level. Anti glare and anti reflective surface treatments are not confirmed by the available LQ121S1LG55 factory parameter set, so they should not be presumed. If sunlight readability or high ambient illumination is a requirement, evaluate the complete front stack, including cover window, printed bezel, optical bonding if present, enclosure angle, and the permitted cleaning process. An added film can change reflections, image clarity, heat retention, and service access.
High Voltage Striking Potential and Secondary Coil Insulation Testing
Do not infer the backlight technology or its electrical architecture from the visible module construction. The LQ121S1LG55 is identified as a TFT LCD display module, but the verified parameter information provided here does not establish whether the original system uses a particular backlight type, inverter arrangement, or dimming method. The service procedure should therefore start with the original panel datasheet and the host equipment schematic.
If the equipment uses a separate backlight power stage, inspect that stage independently before attributing a dim or intermittent image to the LCD panel. Check connector engagement, harness insulation condition, board contamination, cracked solder joints, power supply stability, control signals, and thermal evidence. High voltage circuits, where present in a legacy display architecture, require suitable isolation practices and qualified test methods. Voltage ratings, insulation tests, striking behavior, and permissible measurement points must come from the relevant equipment documentation.
A technician should disconnect equipment power, observe the host manufacturer’s discharge procedure, and verify the circuit state before touching display power connectors or inverter assemblies. Audible noise, brief illumination, or a dark image can each have multiple possible causes. The correct approach is to compare control and supply behavior with the original service record and to use properly rated instruments.
Where a different Sharp display arrangement is being considered for related equipment, LQ9D03B may be reviewed as a separate display solution within the broader system chain. Electrical interface, physical envelope, controller support, and optical requirements must be assessed independently. A part number family relationship or similar appearance does not establish interchangeability.
For potential railway passenger information terminals or cab signalling display equipment, the LQ121S1LG55 should be evaluated only against the installed system’s display controller, mounting enclosure, vibration controls, environmental sealing, and maintenance procedure. Railway use is a compatibility example, not a declaration that this panel independently fulfills rail vehicle approval, safety, insulation, environmental, or EMC obligations. Those obligations belong to the validated equipment system and its documented certification basis.
After reassembly, perform a controlled functional check covering image stability, consistent illumination, cabinet grounding continuity, cable retention, and the response of any separate touch interface. Record the panel designation, host board revision, cable identifiers, observed image state, and the service actions taken. This record helps future technicians distinguish panel level changes from controller, harness, enclosure, and power stage conditions.