
Content last revised on October 3, 2026
AUO P370IVN02-1 Identification and Pre-Installation Checks
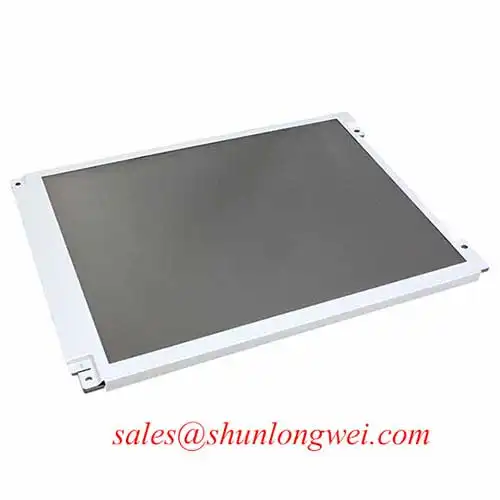
Before powering the assembly, inspect the AUO P370IVN02-1 for cracked glass, frame distortion, damaged flex connections, and contamination around the display interface, then compare the panel identity with the original equipment documentation. The supplied factory information identifies this unit as an AUO industrial-grade LCD/HMI panel in a TFT-LCD display module format. The available specification context does not confirm the panel resolution, active area, interface voltage, backlight electrical ratings, connector pinout, operating temperature, or mechanical drawing, so those values must be verified against the original panel documentation before installation.
| Manufacturer | AUO |
| Part number | P370IVN02-1 |
| Product category | Industrial Grade LCD/HMI Panel |
| Package or construction | TFT-LCD Display Module |
| Specification status | Detailed specifications require verification |
For a replacement assessment, begin with physical compatibility rather than applying power. Check the visible area, bezel opening, mounting points, connector orientation, cable exit direction, and the distance available behind the panel. A display can have a visually similar front appearance while remaining electrically incompatible because of a different timing controller, connector assignment, data format, or backlight control method. The system integrator should verify the required supply voltage and signal arrangement from the original panel documentation.
Single Vertical Hairline Defect & Column-Drive Fault Localization
A single vertical line requires a controlled test sequence because the visible symptom can originate from the display interface, timing electronics, flex attachment, or the panel assembly itself. Start with a known-good image source and inspect the screen using solid red, green, blue, white, black, and mid-gray fields. Record whether the line remains fixed at the same horizontal coordinate, changes contrast between colors, or disappears when the image content changes. This three-stage primary-color check helps separate a persistent column-related defect from an image-source or signal-format problem without assigning a single cause too early.
During the first stage, confirm that the source produces a stable image and that the connector is fully seated with the equipment isolated from power. During the second stage, compare the affected line across the primary-color fields. A defect that remains at the same physical location across multiple fields deserves inspection of the panel-side signal path and flex attachment. During the third stage, use a low-angle flashlight from approximately 45 degrees while the display is showing a dark field. The purpose is to observe whether the line is a visible image defect or a change in reflected light caused by the surface, cover, or backlight assembly. This optical check should be performed without pressing the glass or flex areas.
Where the line changes with cable movement, the engineer should stop mechanical manipulation and inspect the connector retention, cable seating, and strain path. Repeated flexing can make an intermittent connection appear temporarily normal and can complicate later diagnosis. If the line remains stable while the input timing, source board, and cable have been checked, the panel-side column-drive path becomes an evaluation point. The available factory data does not provide a field repair procedure for the panel bonding area, so replacement-level decisions should be based on measured evidence and the equipment service policy.
The supplied information does not establish an official 50,000-hour LED backlight rating or an MTBF curve for this exact part. Do not treat a generic backlight life figure as a confirmed P370IVN02-1 specification. For a life assessment, log brightness uniformity, operating temperature, drive conditions, and hours of operation under the actual enclosure conditions. A reduction in brightness can also be influenced by the driver, optical stack, contamination, thermal distribution, or measurement setup.
Constant Luminance Output Control & L70/B50 Backlight Reliability Verification
Constant luminance evaluation should begin with the complete display assembly rather than the panel alone. Confirm that the installed backlight driver matches the original system architecture and that its current regulation, enable behavior, dimming method, and fault response agree with the equipment documentation. The P370IVN02-1 specification context supplied here does not confirm the backlight type, current requirement, PWM input, analog dimming range, or connector pin definition. These details must be verified before connecting a replacement driver or adapting the harness.
For a practical uniformity check, display a full white field and inspect the center, corners, and narrow edge regions under fixed camera or photometer conditions. Repeat the observation at lower brightness settings and after the assembly has reached a stable operating condition. Edge-to-center differences should be recorded as measurement results, not interpreted as a guaranteed failure threshold unless the original equipment specification defines one. A separate dark-field inspection can reveal light leakage, localized glow, or contamination that may not be visible on a white field.
An aluminum support rail or heat-spreading feature may be considered when the enclosure creates a localized hot area near the narrow display edges. This is a Design Consideration, not an official mechanical requirement for the P370IVN02-1. Any added rail must preserve the manufacturer’s mounting geometry, avoid concentrated pressure on the glass, and maintain clearance around the connector and flex. The thermal design should be verified with measurements at the panel frame, driver region, and enclosure air path while the display operates at the intended luminance.
L70 and B50 terminology should be used only when the applicable test method, sample definition, drive condition, and temperature are known. The supplied product information does not provide an official L70 or B50 value for this model. A valid reliability review therefore requires the relevant AUO documentation or controlled test data for the actual assembly. The engineer should compare luminance readings over time and document the test conditions rather than converting a generic LED curve into a model-specific lifetime claim.
For long-duration HMI evaluation, the wider system context can be reviewed through Industrial Display & HMI Solutions, while the P370IVN02-1 itself should remain assessed against its confirmed mechanical, optical, and electrical documentation.
💡 Pro Tip: Keep the optical measurement setup, image pattern, ambient light, and panel warm-up condition consistent so that luminance changes are not confused with test variation.
Eye-Diagram Voltage Margin & Differential Noise Floor Verification in High-Vibration Bays
When the panel is evaluated for a telematics display in heavy earthmoving equipment, begin at the signal source and trace the complete display path to the module connector. Confirm the interface family, lane arrangement, clock relationship, data mapping, and power sequence from the original system documentation. The supplied factory data does not confirm whether this model uses LVDS or TTL signaling, nor does it publish the connector pinout, JEIDA or VESA mapping, differential impedance, or timing limits. These values must not be inferred from the model number.
For an LVDS installation, the design objective is a controlled differential path with minimal discontinuities. Cable routing should keep the display link away from high-current switching conductors and motor-drive wiring where practical. Shield termination, chassis bonding, and common-mode filtering should be evaluated as a complete system because an isolated shield or an incorrectly placed ferrite can change the noise behavior rather than improve it. Any ferrite component must be selected from measured common-mode behavior and the required signal bandwidth, not from a generic substitution list.
An oscilloscope measurement should compare the incoming clock and data signals at the source and at the panel-side connector, using suitable probing that does not materially load the link. Inspect eye opening, common-mode movement, overshoot, ringing, and timing stability while the equipment changes between idle and active operating states. A horizontal noise band or intermittent pixel disturbance may indicate impedance discontinuity, grounding interaction, clock margin reduction, or a source timing issue; it should be correlated with the measured waveform and operating event rather than assigned to the LCD panel alone.
Some industrial display designs use a nominal 100-ohm differential environment, but that value is a system design target and is not an official P370IVN02-1 parameter in the supplied information. Likewise, a skew budget such as 50 ps must not be presented as a confirmed limit for this model without the applicable interface specification. Designers should control pair geometry and routing consistency, then verify the actual voltage margin and timing performance against the known-good equipment signal path.
Vibration testing should include connector retention, cable strain relief, shield continuity, and the mechanical support around the display. Observe the image while the assembly is exposed to the intended vibration profile, but avoid pressing the glass or flex attachment during the test. If the fault appears only during movement, compare the signal waveform, connector continuity, and mechanical displacement at the same moment. This approach helps distinguish an electrical noise problem from a mechanically intermittent connection.
Preventing Frame Lag & Image Smearing in Cryogenic Storage & Outdoor Industrial Facilities
Before considering the P370IVN02-1 for outdoor or low-temperature equipment, verify the official operating and storage temperature limits for the exact production documentation. Those limits are not included in the supplied factory parameter set. A display that functions during a short cold-start test may still show slow transitions, temporary contrast changes, or delayed image stabilization when the panel, driver, and enclosure remain cold for an extended period.
Gray-to-gray response should be assessed with moving gray patterns and camera-based timing measurements rather than with a static menu image. Record the time required for representative transitions at the intended brightness and ambient conditions, then compare the result with the operational requirement of the HMI. Apparent smearing can also be influenced by source refresh timing, image-processing settings, cable errors, or camera exposure, so the measurement method should be fixed before comparing results.
Power sequencing is another compatibility point. Confirm the order and timing of the panel supply, logic signals, display enable, and backlight control from the original equipment documentation. Do not assume that a replacement harness can be connected in any order or that an unverified control signal is safe for the module. The system integrator should confirm connector pin assignment and electrical levels before the first powered test.
Perimeter sealing and enclosure design should be checked against the real environmental exposure. The supplied data does not confirm an epoxy sealant specification, ingress rating, or qualification across a particular thermal cycle. Designers should evaluate enclosure condensation, pressure changes, cable entry sealing, thermal expansion, and mechanical stress around the bezel. Any sealant or gasket modification must preserve service access and avoid transferring force to the display glass.
Backlight dimming should also be verified as an electrical interface function. The available product information does not confirm whether the P370IVN02-1 accepts PWM dimming, analog control, or a dedicated driver arrangement, so a generic PWM range such as 200 Hz to 1 kHz cannot be assigned to this model. When the original system uses PWM, inspect duty-cycle behavior, visible flicker, audible interaction with the driver, and image stability across the required brightness range. The final setting should be determined by the original panel documentation and measured system performance.
For a replacement in an earthmoving equipment telematics display, complete the evaluation with a side-by-side check of the original unit and the P370IVN02-1 across image geometry, connector fit, mounting alignment, power sequencing, backlight control, and cold-start behavior. ⚠️ Field Alert: Disconnect equipment power and allow stored energy to discharge before inserting or removing the display cable.

