Content last revised on October 23, 2026
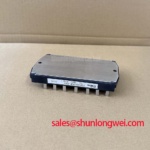
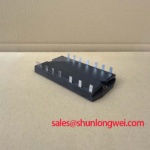
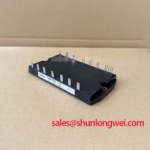
Fuji Electric 7MBR10NF-120 Ratings and Initial Checks
- Isolate the equipment supply, verify that the DC link is discharged, and disconnect external paths that could distort cold terminal measurements.
- Match the 7MBR10NF-120 terminal markings to the equipment schematic before checking semiconductor junctions in diode mode.
- Inspect the mounting surface, terminal supports, and thermal interface for contamination, uneven contact, or mechanical loading.
- Check the gate-drive connections and insulation boundaries before authorizing any powered diagnostic test.
The Fuji Electric 7MBR10NF-120 is a power integrated module whose replacement assessment starts with its electrical ratings and circuit connections—not its outline alone. For an equipment repair, separate the module from the surrounding driver, DC-link components, and load sufficiently to establish which measurements belong to the module itself. A reading taken through connected circuitry can conceal a damaged junction or make a serviceable device appear suspect.
The following supplied specifications establish the principal rating boundaries. The saturation voltage is a typical characteristic rather than a guaranteed voltage drop throughout operation; the isolation rating is not an instruction to apply that voltage during routine servicing.
| Parameter | Official Specification | Repair and integration significance |
|---|---|---|
| Manufacturer and model | Fuji Electric 7MBR10NF-120 | Match the complete designation against the equipment parts record. |
| Collector-emitter voltage | 1200 V | Blocking-voltage boundary for evaluating the power circuit and switching transients. |
| Collector current | 10 A at case temperature 80 °C | The stated case-temperature condition belongs with the current rating. |
| Collector-emitter saturation voltage | 2.1 V typical | A conduction characteristic whose interpretation depends on the datasheet measurement conditions. |
| Isolation voltage | 2500 V AC | A specified insulation withstand characteristic, distinct from a service insulation-resistance test. |
| Terminal map, outline, and mounting requirements | Consult Datasheet | Use the applicable drawing and assembly instructions for mechanical and electrical matching. |
7MBR10NF-120 Circuit Protection & Reliability: Diagnosing Gate-Emitter Dielectric Damage
Use diode-check mode across the identified power junctions with the module disconnected from parallel current paths and its gates controlled according to the service procedure. Record probe polarity and terminal names for each reading. Where the circuit diagram identifies comparable switch positions, compare their behavior under the same meter conditions rather than imposing a generic forward-voltage acceptance window.
Design Consideration: A handheld meter supplies only a limited test stimulus. Its reading can reveal a gross short circuit, an unexpected conductive path, or an obvious difference between comparable junctions, but it cannot establish switching performance at operating voltage. Gate charge can also alter an uncontrolled measurement, so inconsistent readings deserve a repeatable connection procedure before they are interpreted as component damage.
Check the gate-emitter path after isolating the driver connection. External gate resistors, discharge resistors, and protection components can dominate an in-circuit resistance measurement. If an apparent leakage path disappears when the driver is disconnected, investigate that circuitry separately. If it remains, compare the result with the manufacturer's test method and a known-good reference under equivalent conditions. A cold multimeter check does not certify the absence of latent gate dielectric damage.
The module's circuit diagram should govern which junctions are accessible and how their paths are interpreted. Fuji Electric's PIM 7-Pack product information provides useful family-level context, but a family diagram does not replace the terminal assignment for this exact part. Keep rectifier paths, inverter switches, and any braking-related connections distinct when mapping the equipment schematic.
Design Consideration: Before controlled re-energization, inspect the surrounding overvoltage protection rather than treating a replacement module as the entire repair. An existing MOV network should be assessed for its location, condition, continuous-voltage capability, and coordination with upstream protection. Its clamp behavior must be considered at the applicable surge current. An MOV elsewhere in the cabinet does not automatically limit the fast collector-emitter transient produced by the local switching loop.
For that local transient, minimize the commutation-loop area and unnecessary separation between outgoing and return conductors. Where the original assembly uses laminated busbars, preserve their alignment, insulation, and connection geometry. Altering the busbar stack or adding long repair leads changes parasitic inductance. The system engineer should evaluate turn-off overshoot using appropriate differential probing and representative operating conditions, then coordinate gate behavior and suppression components with the measured waveform.
A cross-model search should remain a compatibility exercise. The 7MBR75VZ120-50 can be included in a broader Fuji module comparison, but its related naming does not establish interchangeability with the 7MBR10NF-120. Compare circuit topology, terminal placement, gate-drive requirements, switching characteristics, mechanical interfaces, and protection coordination before considering any change to the equipment bill of materials.
7MBR10NF-120 Circuit Protection & Reliability: Baseplate Isolation Testing
Disconnect sensitive connected electronics before any terminal-to-baseplate insulation test, and establish the permitted test configuration from the module and equipment procedures. Identify which terminals must be grouped, which must remain isolated, and where the test return is connected. This preparation prevents a test intended for the insulation boundary from imposing an unintended differential voltage across semiconductor junctions or driver circuitry.
The 2500 V AC isolation specification must remain separate from insulation resistance, DC test voltage, and repetitive operating stress. These quantities describe different tests or operating conditions. Converting the AC withstand figure into a routine DC megohmmeter setting would require an approved procedure, including duration, terminal connections, ramp behavior, and acceptance criteria. Do not introduce an arbitrary resistance threshold as though it were a Fuji production limit.
Design Consideration: Inspect exposed insulating surfaces before testing. Conductive dust, moisture, terminal residue, and contamination around mounting features can create surface leakage paths that complicate interpretation. Clean using materials compatible with the assembly, allow the relevant surfaces to dry, and record the environmental and connection conditions. If a reading changes after cleaning, investigate the contamination path rather than assigning the result immediately to internal insulation damage.
A terminal-to-baseplate measurement assesses the accessible insulation boundary; it does not identify the internal substrate material or locate a microscopic defect. General galvanic isolation principles explain the separation of conductive domains, but they do not establish this model's construction or its service-test limits. Preserve that distinction when recording the repair findings.
Check creepage paths along surfaces and clearances through air against the equipment's insulation design. Look for shifted busbars, displaced insulating barriers, loose hardware, and wiring that has moved toward an exposed terminal. Dust deposits deserve particular attention where they bridge otherwise separated surfaces. The required distances depend on the system's voltage stresses, environment, materials, and applicable standard; the module voltage rating alone does not specify them.
Design Consideration: Restore cable and busbar supports so that vibration and thermal movement are not carried principally by the module terminals. A fastening that feels tight does not establish correct preload, and a terminal should not be used to pull a misaligned conductor into position. Inspect mating faces, thread condition, support locations, and the specified locking arrangement before tightening according to the assembly instructions.
Keep adjacent power stages electrically distinct during topology checks. A related power-module reference such as the 6MBI100U4B-120 may be relevant when documenting another switching stage, but it should not be treated as a front-end rectifier or a complementary replacement simply because it appears in the same system review. Follow the actual schematic from the incoming supply through rectification, the DC link, and the controlled switching stages.
Assembly Integrity & Layout Architecture: Implementing Baseplate Thermal Grease Layer Control for 7MBR10NF-120
Remove old interface material and inspect the module mounting face and heatsink before applying fresh thermal compound. Check for burrs, embedded particles, raised damage around fastening points, and evidence of uneven previous contact. A new grease layer cannot correct a damaged mating surface, and additional tightening should not be used to force a distorted assembly flat.
Design Consideration: Select the thermal interface material and application method as a matched assembly process. Grease should fill surface irregularities without becoming an unnecessarily thick thermal barrier. Its suitable applied amount depends on the compound, mounting geometry, surface condition, and clamping method. Use the approved process rather than assigning a universal film thickness to the 7MBR10NF-120.
Apply the material consistently over the intended contact region, avoiding trapped contamination and obvious discontinuities. Where process qualification permits a contact-pattern inspection, examine the transferred pattern after controlled assembly to identify dry areas, excessive accumulation, or asymmetric contact. Treat that pattern as assembly evidence, not as a direct measurement of junction temperature or proof of internal condition.
Field Alert: Do not use the mounting screws to pull a tilted module onto the heatsink; establish proper seating before applying the specified tightening sequence and torque.
Bring the mounting points into contact progressively using the manufacturer's assembly sequence. Keep external conductors supported during this operation so they do not twist the housing or disturb seating. Recheck terminal alignment after mounting, especially when the replacement follows a repair involving changed busbars, cable routing, or heatsink hardware. Mechanical compatibility includes the completed assembly, not just the spacing of its mounting holes.
Design Consideration: The supplied 2.1 V typical saturation characteristic helps explain why conduction contributes to heating, but thermal assessment must also include switching losses and the operating duty. The 10 A at 80 °C case temperature rating should therefore remain tied to its stated condition. Case-temperature measurement, heatsink condition, airflow or coolant performance, and the operating waveform together provide a more useful integration check than an isolated current reading.
For broader context, The Advanced Thermal Management Revolution discusses thermal-management approaches across power electronics. Use it as background for understanding heat-flow paths, not as evidence that this particular module contains every substrate or cooling construction discussed there.
When evaluating compatibility with a precision stepper or BLDC motor servo motion actuator, compare the existing power-stage schematic, modulation duty, cooling arrangement, and mechanical envelope. In a separately assessed bidirectional battery converter, changing power-flow direction can change which switches and diodes dissipate heat; that observation does not establish suitability for the application. Thermal cycling should be assessed from the actual load profile without assigning an unsupported service-life extension.
Complete the assembly check by confirming unobstructed cooling, restored conductor supports, and temperature-sensor contact where fitted. During the equipment's approved controlled-load test, compare temperature behavior with the established service baseline and investigate uneven heating alongside electrical loading and cooling conditions. If a thermal interface is disturbed during corrective work, clean and reapply it using the same qualified assembly process before repeating the test.