Content last revised on September 23, 2026
Evaluating Solid-State WLED Driving, PWM Dimming & Flicker Suppression
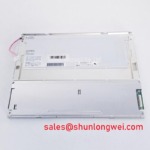
Begin service evaluation by isolating the display from the control system, inspecting the panel connector and flex cable for contamination or mechanical stress, and measuring the logic supply at the designated power pins with a digital multimeter. The supplied specification identifies 3.3 V / 5.0 V ± 0.5 V as the logic supply range for the NEC NL8060BC31-32. The system integrator should verify the required supply voltage from the original panel documentation before applying power.
A white screen, unstable image, or driver latch-up can have several possible causes, including incorrect supply selection, poor connector contact, an unsuitable timing configuration, or a damaged signal path. Record the supply voltage during startup and while the image is active. A static measurement alone may not reveal a transient drop or supply disturbance, so an oscilloscope comparison against a known-good controller can be useful during fault isolation.
The requested backlight assessment refers to solid-state WLED operation, constant-current driving, 1000:1 PWM dimming, and flicker control. These characteristics should be treated as system-level integration points unless confirmed by the original NEC documentation for the exact panel revision. The supplied official specification confirms a typical backlight lifetime of more than 50,000 hours, measured with optical luminance monitoring until brightness reaches 50% of the initial level. This is a typical lifetime specification, not a guaranteed operating period for every installation.
When a CNC operator panel or robot teach pendant uses a replacement display, the backlight driver must be matched to the panel’s documented electrical interface. Verify the LED current regulation method, enable behavior, dimming input, polarity, and startup sequence from the original system documentation. Do not assume that a controller designed for another LCD can directly provide the required backlight drive.
For a field unit that powers up but shows intermittent brightness, compare the backlight enable signal, supply stability, and luminance response at several brightness settings. Audible noise or visible modulation may indicate an interaction between the host controller and the backlight driver rather than a panel cell defect. A controlled bench test with the original driver board can separate display faults from system-level PWM or current-regulation behavior.
The 50,000-hour backlight figure should be used as a service-planning reference. Actual brightness retention is affected by operating temperature, drive current, enclosure airflow, duty cycle, and contamination around the display opening. Where a long service interval is required, maintenance teams should record initial luminance and compare later measurements using the same instrument position and ambient-light conditions.
Preventing Frame Lag & Image Smearing in Cryogenic Storage & Outdoor Industrial Facilities
Before installing the panel in a cold cabinet or outdoor enclosure, allow the assembly to reach a stable temperature while protecting the exposed connector and optical surfaces from condensation. A display that has been moved from a cold storage area into a warmer, humid environment should not be energized until the equipment procedure confirms that moisture risk has been controlled.
Liquid-crystal response changes with temperature. At low temperature, increased viscosity can produce slower gray-to-gray transitions, image trailing, or delayed changes in small text and moving graphics. These symptoms should be evaluated with the actual controller timing and image content used by the CNC operator panel or robot teach pendant. A static color-bar test may not reveal the same behavior as rapidly changing alarm text or machine-position feedback.
The supplied data does not establish a guaranteed operating temperature range, contrast ratio, anti-glare coating specification, epoxy sealant formulation, or a defined low-temperature response time for this model. Designers should verify these characteristics from the original NEC datasheet and the equipment qualification record before approving the panel for a cryogenic or outdoor application.
For outdoor evaluation, inspect the image under the intended ambient illumination rather than relying only on a dark-room check. Direct sunlight can reduce perceived contrast and make gray-level defects more difficult to distinguish. A suitable assessment should compare black-level visibility, white-field uniformity, character readability, and touch or operator-interface response at the actual viewing angle.
Frame lag can also be influenced by the host graphics controller, LVDS or TTL timing, frame rate, cable routing, and image-processing settings. When the panel appears slow, capture the input timing and compare it with the known-good configuration. Check whether the symptom follows the display assembly or remains with the controller and cable. This approach avoids assigning a single cause before the complete signal path has been measured.
Thermal cycling deserves mechanical as well as electrical inspection. Repeated expansion and contraction can place stress on the bezel, connector region, flex cable, and perimeter sealing interface. Designers should provide even support around the display and avoid clamping the active area. The enclosure should also prevent direct air jets from creating a local temperature gradient across the panel.
For equipment that may be evaluated in cold storage, outdoor monitoring, or unheated service areas, the qualification plan should define the required warm-up behavior, condensation controls, image-response acceptance criteria, and optical inspection method. These are system acceptance conditions and should not be presented as factory specifications for the NL8060BC31-32.
When the original panel cannot be sourced for a particular machine, the NL128102BC28-04 may be reviewed as a separate display option. Mechanical outline, resolution, connector assignment, timing, backlight interface, and enclosure clearance must be checked independently before any substitution decision.
Aluminum Heat Spreader Sizing & Thermal Interface Placement along Narrow Display Edges
Inspect the display opening and rear enclosure before adding any heat-spreading hardware. A narrow aluminum rail can help distribute heat from a localized source, but it can also introduce pressure, thermal gradients, or electrical clearance problems if it contacts the panel frame or flex connection unintentionally.
The NL8060BC31-32 supplied data confirms the logic supply range and the typical backlight lifetime, but it does not provide a model-specific heat-spreader size, thermal resistance, LED junction temperature, or maximum enclosure temperature. Heat-spreader dimensions should therefore be determined from measured system losses, available contact area, airflow, and the temperature limits documented for the complete display assembly.
A practical evaluation begins with temperature mapping during the highest expected brightness and processing load. Measure the rear frame, connector area, controller board, and enclosure surfaces after the system reaches thermal equilibrium. Compare these readings with the original installation and check whether the proposed rail changes the temperature distribution rather than simply moving heat toward the display edge.
Thermal interface placement should avoid the active optical area and any region where compressive force could distort the panel. The interface material must be compatible with the enclosure materials and must not interfere with the flex cable bend path. If a spreader is bonded or clamped, verify that the attachment method remains stable during thermal cycling and vibration testing.
The requested PWM range of 200 Hz to 1 kHz and associated duty-cycle linearity should be treated as a backlight-driver evaluation target, not as a confirmed NL8060BC31-32 factory parameter. The system integrator should verify the actual dimming interface and test the selected frequency across brightness settings. Flicker perception depends on modulation depth, camera exposure, viewing conditions, and the response of the complete optical system.
For natural text and numerical readouts, inspect the panel with scrolling characters, rapidly changing status values, and alternating high-contrast screens. Check both direct viewing and camera-based inspection where machine records are captured. Audible noise, beat patterns, or brightness steps may arise from the driver, power supply, or PWM control interaction, so the complete backlight circuit should be evaluated.
Heat management should also account for the cabinet’s fan path and filter condition. A display may operate correctly on an open bench while developing localized temperature rise inside a sealed operator panel. Maintenance Note: Check the enclosure airflow path and display support gasket during scheduled service, and remove dust or compression damage before it affects thermal transfer or mechanical alignment.
Where the panel is used in a CNC operator interface or robot teach pendant, the thermal design should preserve connector retention and cable flexibility while maintaining a stable bezel fit. Designers should verify the resulting temperatures during startup, maximum luminance, prolonged static screens, and the most demanding controller workload.
The related Industrial Display & HMI Solutions resource can be used as a broader engineering reference when assessing enclosure sealing, heat flow, service access, and environmental qualification around industrial displays.
Flush-Mount Open-Frame Bezel Integration & Perimeter Gasket Shock Isolation
Place the NL8060BC31-32 into the intended bezel opening without tightening the fasteners, then check the display position, connector access, flex-cable routing, and gasket contact around the complete perimeter. The panel should be supported evenly and should not rely on the active glass area to correct a distorted chassis opening.
The supplied mechanical design consideration specifies 0.35–0.45 N·m for M3 chassis screws. This is an integration guideline, not an NEC factory guarantee. Use a calibrated torque screwdriver and tighten progressively in a cross-pattern so the bezel load is distributed. Confirm the actual fastener, washer, thread engagement, gasket material, and enclosure construction before applying the value to a production assembly.
Excessive or uneven clamping can create optical mura, edge brightness variation, or cell-gap distortion. These effects may be more visible on a dark screen or at low brightness. If a defect changes when the bezel screws are loosened and retightened, inspect the enclosure flatness, gasket compression, mounting-hole alignment, and local contact points before replacing the display.
Shock and vibration isolation should be designed around the equipment’s measured acceleration and frequency profile. The gasket should retain the panel during handling while allowing the enclosure and display assembly to accommodate small relative movement. Avoid routing the flex cable across a sharp edge or trapping it beneath a rigid bracket. The final bend radius and connector locking method should follow the original panel and connector documentation because those values are not provided in the supplied specification.
For TTL or LVDS systems, verify the connector pin assignment, signal polarity, supply sequencing, clock relationship, data hold behavior, and cable termination against the original controller documentation. The supplied data identifies 100 Ω ± 10% differential line impedance as a design consideration. This value should be verified with the actual PCB trace and cable arrangement, preferably using a suitable differential measurement or TDR method.
Pixel jitter, horizontal sparkle, or intermittent image loss may indicate impedance discontinuity, connector contact variation, clock quality problems, or electromagnetic coupling. Inspect the complete path from the controller to the display and compare waveforms with a known-good assembly. Do not treat one visual symptom as proof of a single component failure.
The bezel should leave service access for connector inspection without requiring the display to be twisted or lifted by its flex cable. Before closing the enclosure, verify that the gasket remains seated, no screw head touches the panel edge, and no cable is pressed against a moving cover. Perform the final image test after the enclosure has been fully fastened because mechanical loading can change optical uniformity and signal stability.
For a CNC operator panel or robot teach pendant, the final acceptance record should include the measured logic supply, connector and cable inspection, bezel torque method, image uniformity check, backlight behavior, and temperature observations. These records help distinguish display performance from installation-related effects during later maintenance.